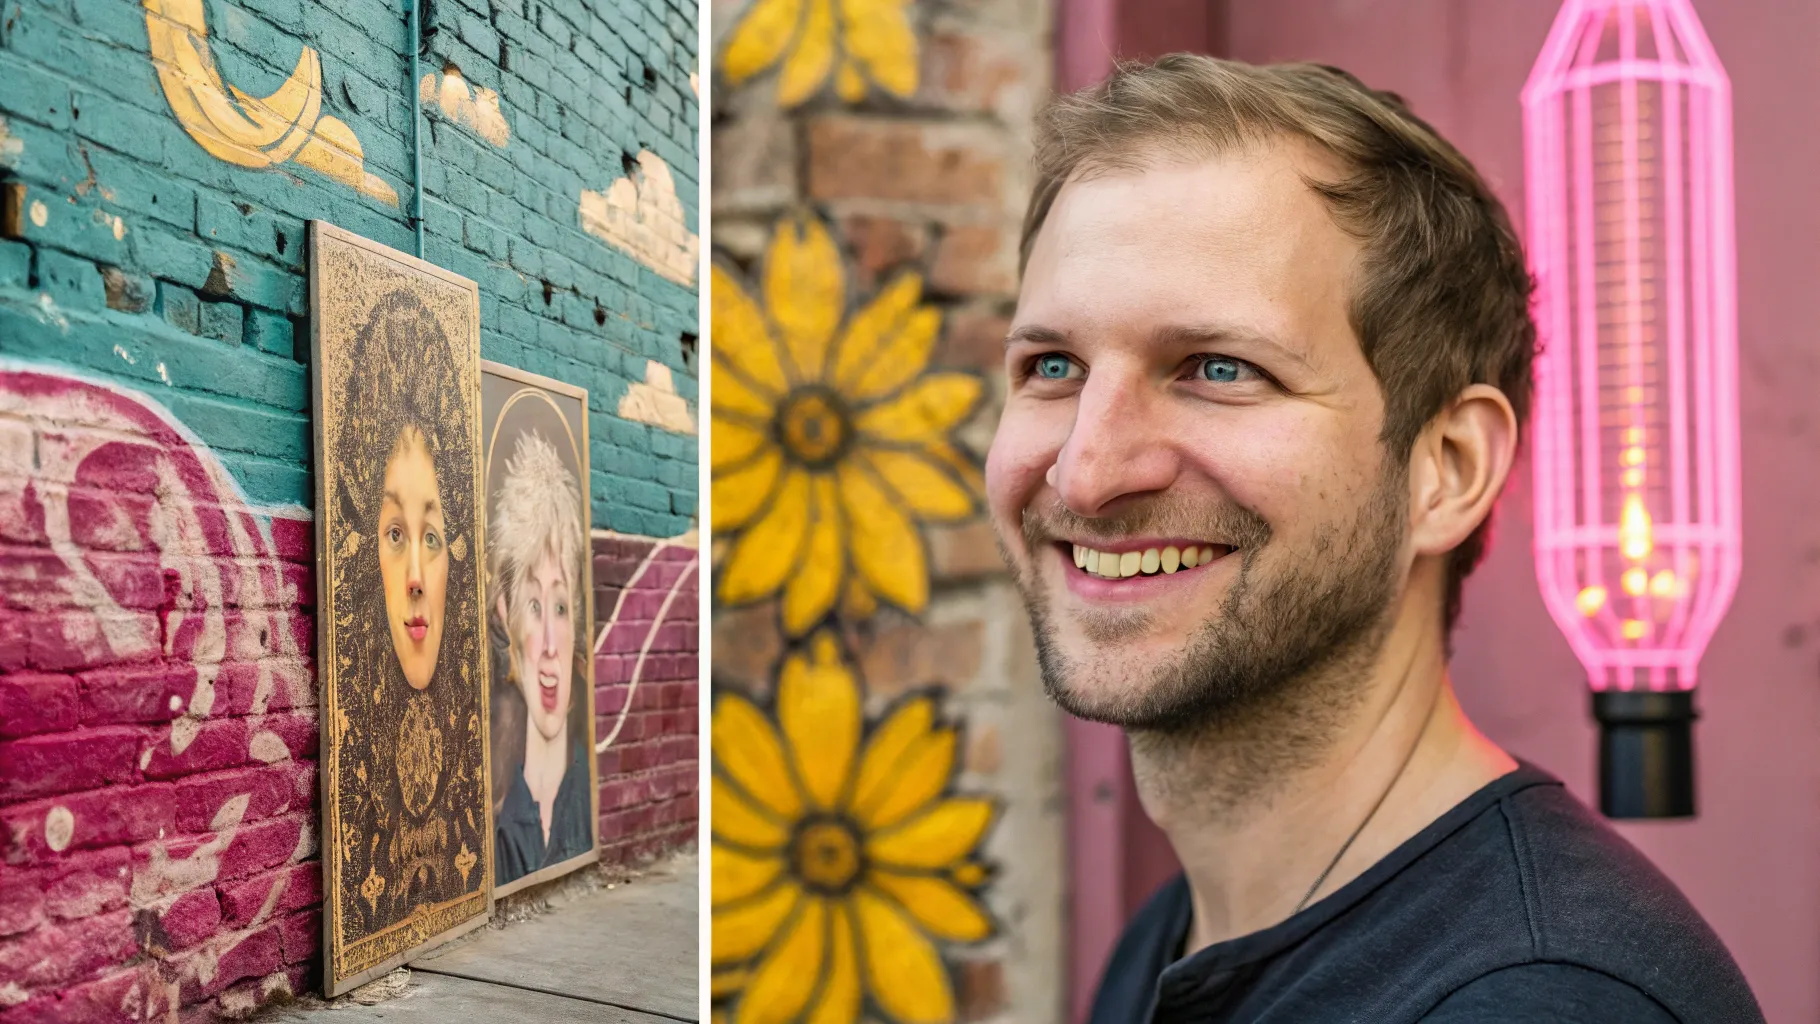
In a recent release I produced for Google, I introduced a quick and playful way to "Nano Banana" your profile pic using Google Gemini. In that short video I invited people to experiment with creative prompts that turn a standard headshot into bold, unexpected, and shareable visuals — from graffiti murals to tarot cards to neon signs and ceramic mugs. In this article I report on that release, explain the techniques I used, and provide step-by-step guidance, prompt templates, troubleshooting tips, ethical considerations, and practical use cases so you can recreate and expand on these ideas yourself.
As the author of the original video and a member of the Google team, I’m writing this in a friendly, newsroom-style voice to make the information easy to follow. If you haven’t tried Gemini yet, you can get started at https://gemini.google.com/ and learn more about the image-generation features (including the playful "Nano Banana" experiments) at https://gemini.google/overview/image-generation/.
"Thank you."
🧭 What Google Gemini and "Nano Banana" mean for your profile pic
Google Gemini is our multimodal AI platform that can generate images from text prompts, refine edits, and produce stylized variations of your photos. "Nano Banana" is the lighthearted phrase we used in the video to describe tiny, playful transformations of a headshot — think micro-sculptures of your visage, stylized emblems, or imaginative mockups that preserve your likeness while presenting it in a fresh context.
When I talk about upgrading your profile pic with Gemini, I'm referring to the process of taking an existing photo (or a prompt describing a person) and applying creative image-generation prompts to create something new — for social media, professional platforms, avatars, or even physical products like mugs and prints.
Technically, Gemini supports a variety of outputs: realistic photorealistic images, stylized illustrations, graphic design treatments, and context-aware scene generation. This versatility makes it ideal for creating profile pics that stand out while still representing the person at the center of the image.
📸 Why upgrade your profile picture now? A short newsroom-style briefing
Profile pictures are the small but powerful way people identify you across platforms. Within seconds a viewer forms impressions about your professionalism, personality, and creativity. Over the past few years, the expectations and visual language of profile pics have shifted: stylized avatars, consistent branding, and artistic treatments are increasingly common.
In a concise announcement style: I believe now is an excellent time to update your profile image because image generation tools are more accessible than ever. Gemini lets you try bold visual experiments quickly and safely, preserving identity while enabling artistic transformation. Whether you're looking to refresh your LinkedIn presence or make a memorable Twitch avatar, Gemini gives you more options than traditional photo editing.
From a product perspective, Gemini's image-generation features are designed to deliver high-quality results with a few targeted prompts. In the video, I outlined four practical and whimsical prompts you can start with immediately: Graffiti Mural, Tarot Card, Neon Sign, and Ceramic Mug. Each of these demonstrates a different way to reinterpret a headshot while keeping the subject recognizable.
✨ Four creative prompts to try now (and how I crafted them)
Below I present the four prompts from the video and expand on them with full prompt templates you can copy and modify. I include variations that emphasize mood, color, composition, and platform optimization. Use these as starting points and iterate — small changes to adjectives or composition often produce wildly different results.
Graffiti Mural — Turn me into a huge, graffiti mural on the side of a building
Goal: Create a large-scale street-art mural version of your face that looks believable on a textured wall. This works great as a bold Instagram hero image or as a header image for a creative portfolio.
Prompt template I used and recommend:
- Base prompt: "Turn me into a huge, graffiti mural on the side of a building. Preserve my likeness with expressive facial features, bold spray-paint style, drips and layered colors, realistic wall texture and shadowing, wide-angle view, vibrant high-contrast color palette, daylight lighting, urban setting."
Variations and additional modifiers:
- Add "photorealistic wall texture" or "concrete texture" to emphasize realism.
- Add "stencil art" or "pop-art halftone" for a stylized look.
- Try "sunset lighting" to warm the mural tones and create long shadows.
- Set aspect ratio to wide (16:9) for banner use, or square for Instagram.
- If you want a specific city vibe, add "Brooklyn alley", "Berlin street", or "Tokyo neon backstreet" to localize the aesthetic.
How I ensured likeness: I included explicit language like "preserve my likeness" and referenced specific features to keep intact (e.g., "retain the exact eye shape, nose, and smile"). Gemini responds well when you provide constraints and specify the artistic technique.
Tarot Card — Create a custom tarot card with a detailed folk-art, vibrant color style, of me
Goal: Transform a headshot into a richly designed tarot card — ornate borders, symbolic elements, and a distinct color language. This makes for a magical profile pic, a collectible deck entry, or a themed avatar set.
Prompt template I used and recommend:
- Base prompt: "Create a custom tarot card featuring me, in a detailed folk-art style with vibrant colors. Full-body portrait in a symmetrical layout, ornate gold filigree borders, symbolic elements that reflect creativity and courage (e.g., lion, torch, stars), textured paper background, hand-painted look, slightly aged patina, center figure retains my facial likeness and expression."
Variations and additional modifiers:
- Change the archetype: "The Magician", "The Empress", "The Wanderer".
- Switch style: "Art Nouveau" for flowing lines, "Medieval illuminated manuscript" for a historical feel.
- Adjust color palette: "jewel tones", "muted earth tones", or "high-contrast black and gold".
- Add symbolic props: "holding a book", "standing on a crescent moon", "surrounded by flora".
Why it works: Tarot-card treatments are visually dense, which allows Gemini to incorporate multiple stylistic elements. By specifying both style and symbolic content, you get a detailed image that still reads as a personal portrait.
Neon Sign — Turn me into a simple neon sign hanging on a wall
Goal: Render the subject as a neon outline or sign, hanging on a textured background. Neon signs read great at small sizes, so this is perfect for avatars and profile icons that need high recognizability in a tiny image.
Prompt template I used and recommend:
- Base prompt: "Turn me into a simple neon sign hanging on a wall. Minimalist neon outline of my face and hair, single-color neon (electric cyan or hot pink), realistic neon glow, slight reflector light on textured brick background, hanging chain and subtle shadow, preserve my silhouette and key facial contours."
Variations and additional modifiers:
- Try "double-line neon" for thicker emission and more detail.
- Use "animated GIF mockup" to envision flickering neon (note: Gemini generates static images, but you can export frames for animation later).
- Swap background: "dark interior brick" vs "white plaster" to change contrast.
- Include text: "add cursive neon name 'Alex' beneath the sign" for personal branding.
Key prompt engineering tip: Emphasize silhouette and contours when the medium reduces detail (neon outlines simplify facial features). This preserves recognizability at small sizes.
Ceramic Mug — Preserving my likeness, create a ceramic mug version of my head. Make my head the entire mug
Goal: Turn your face into a fun product mockup — an entire mug shaped like your head. This is playful merch content, ideal for profile pics if you want a whimsical persona or for printing as a novelty item.
Prompt template I used and recommend:
- Base prompt: "Preserving my likeness, create a ceramic mug version of my head. Make my head the entire mug, glossy ceramic texture, realistic glaze reflections, handle positioned naturally, subtle studio lighting, white background for ecommerce mockup, maintain facial proportions and expression."
Variations and additional modifiers:
- Try "matte ceramic" instead of glossy to reduce reflections.
- Ask for "top-down view" or "three-quarter view" depending on how you want to showcase the mug.
- Add "boxed product photo" for a retail-style image or "on a kitchen counter" for lifestyle shots.
- Request multiple angles for a 360-degree product set.
Practical note: If you plan to actually manufacture a ceramic mug, use the image as mockup inspiration and work with a manufacturer to adapt the design to real-world printing constraints.
🛠️ Step-by-step: How I created my profile pic with Gemini
In the video I gave a quick demonstration, but here I’ll provide a detailed, newsroom-style step-by-step walkthrough. I’ll assume you have a single headshot you want to transform. If you don’t have a photo, Gemini can also generate portraits from textual descriptions, but preserving likeness from an uploaded image yields more consistent identity results.
- Choose or take a clear headshot. Aim for good lighting, neutral background, and a clear view of key facial features (eyes, nose, mouth). This helps Gemini preserve likeness and produce cleaner results.
- Open Gemini image generation. Go to https://gemini.google.com/ and sign in with your Google account. I recommend using a desktop or laptop for easier cropping and file management, but mobile works fine too.
- Upload your image (optional). If you want to preserve your specific facial features, upload the headshot. Otherwise, craft a descriptive prompt to generate a fresh portrait.
- Enter your prompt. Use one of the templates above. Be explicit: include style, medium (e.g., mural, neon), mood, colors, and "preserve my likeness" or similar phrasing if using an uploaded photo.
- Adjust advanced settings (if available). Set aspect ratio to square for avatars, or choose wide for banners. If a quality or fidelity slider exists, opt for higher fidelity for detailed outputs.
- Generate multiple variations. I always run 8–12 generations per prompt. Small creativity tweaks often yield the one standout image you want to use.
- Refine with follow-up prompts or edits. If a generated image needs minor tweaks — color, crop, or expression — use Gemini’s inpainting/editing features, or add explicit constraints in a follow-up prompt (e.g., "reduce background clutter", "make eyes slightly warmer").
- Export and test across platforms. Download the final image and test it as a profile picture on each platform to check crop and legibility. You may need to produce platform-specific crops (square, circle, 1:1) to ensure the subject remains centered.
In the video I highlighted quick prompts, but the real power comes from iterating. I often run a batch of prompts, pick top candidates, and then refine the chosen image for specific platform constraints.
✍️ Tips for writing prompts and getting consistent results
Prompt crafting is part art and part systematized experimentation. Here are the heuristics I use when I want consistent results across multiple images or styles.
- Be explicit about likeness: Use phrases such as "preserve my likeness", "retain exact facial features", or "keep the same eyes, nose, smile". This reduces identity drift in stylized transformations.
- Specify the artistic medium: "spray paint mural", "hand-painted tarot card", "neon tube sign", "glazed ceramic". The medium guides texture, reflection, and rendering choices.
- Control scale and context: Words like "huge", "monumental", "miniature", "close-up", "three-quarter view", "full-body", or "head-only" dictate framing and detail.
- Use color palettes and lighting cues: "vibrant jewel tones", "muted earth tones", "sunset lighting", "studio softbox lighting". These set mood and contrast.
- Add composition instructions: "centered", "symmetrical layout", "rule of thirds", "wide-angle view". These help the model place the subject appropriately.
- Include negative prompts: If your interface supports them, use negative prompts to avoid unwanted elements: "no extra people", "no text", "no watermark", "no distortions".
- Anchor with reference styles: Names of artistic movements or artists (use responsibly and within platform policy) like "Art Nouveau" or "folk-art" can steer the aesthetic.
- Iterate with small changes: Change one adjective or constraint at a time to learn which phrases cause the biggest visual shifts.
For batch consistency (e.g., a set of avatars with the same style), I fix a core phrase such as "in a neon sign style, cyan single-color, preserve likeness" and vary only the pose or accessory. This creates a visually coherent set while maintaining identity.
🔒 Privacy, safety, and ethics: what I consider before generating
As a responsible product author, I want to highlight privacy and ethical considerations. Image generation that involves faces raises questions about consent, representation, and misuse. I’ll summarize practical guidelines and the policies I recommend following.
- Only generate images of people who have given consent. If you’re creating images of someone else, get explicit permission. For minors, obtain parental consent.
- Be cautious with public figures. Generating images that portray public figures can be sensitive; follow platform and legal guidelines about likeness and impersonation.
- Respect platform policies and local laws. Different jurisdictions have varying regulations about biometric data and synthetic media. Check terms of service and legal requirements before publishing.
- Protect sensitive attributes. Avoid generating images that manipulate or misrepresent race, gender, disability, or other protected characteristics in harmful ways.
- Disclose synthetic content when appropriate. If an image is clearly artificial or used in contexts where identification matters (news, official profiles), consider labeling it to avoid deception.
- Check image usage rights. If you plan to commercialize or manufacture designs (e.g., mugs), review licensing and IP guidelines.
Google provides guidance and policy documents for responsibly using Gemini. If you’re part of an institution or company, coordinate with your legal and compliance teams to ensure the images align with your policies and regional regulations.
🌐 Platform-specific recommendations and use cases
Different platforms have distinct visual constraints and audience expectations. Below I summarize practical advice for several common platforms and scenarios, so your Gemini-generated profile pic performs well wherever you use it.
LinkedIn (professional)
- Keep it polished and slightly conservative: choose more subtle stylizations (e.g., light illustration, tasteful color accents) rather than extreme fantasy.
- Make sure the face is clearly visible and centered; avoid heavy ornaments that obscure facial features.
- Use square assets and test how the circular crop affects composition.
Instagram (personal/creative)
- Be bold and expressive: murals, tarot cards, and neon signs work well here.
- Consider stories and highlights — a neon sign avatar pairs nicely with animated story content (created separately).
- Square or vertical compositions perform well; maintain high contrast to stand out in the feed.
Twitch / YouTube (streaming and video)
- Focus on high recognizability at small sizes. Neon outlines or simplified graphic avatars are effective.
- Create a set of assets (avatar, banner, overlays) in the same style for cohesive branding.
- For video intros, use stills combined with simple motion in editing software to bring static Gemini images to life.
Professional Teams / Slack / Email
- Use a clear, uncluttered headshot-style image for directories and signatures.
- Consider a subtle artistic treatment (slight illustration shading) but avoid anything that could be misread in a business context.
Across all platforms, always test the final image at the actual display size to ensure eyes and facial cues remain readable.
🧰 Troubleshooting common issues and how I fixed them
Even with good prompts, generated images can sometimes have artifacts or unintended outcomes. Here are common problems and solutions I use when refining results.
- Problem: Facial features distort or look off. Solution: Add explicit constraints like "retain exact facial features", increase fidelity, or supply a higher-resolution input photo. Use inpainting to correct specific areas.
- Problem: Background clutter or unwanted text appears. Solution: Use negative prompts ("no text", "no extra people") and specify "plain background" or "white background".
- Problem: Color casts or unrealistic skin tones. Solution: Add "natural skin tones", "accurate color balance", or reference a photographic lighting setup ("studio softbox") in your prompt.
- Problem: Hands or small details look wrong. Solution: Avoid including complex hand poses if the generation model struggles; if necessary, supply a reference image for hands or edit afterwards in a specialized editor.
- Problem: The subject is unrecognizable after heavy stylization. Solution: Soften the artistic style or include more identity-preserving language ("same eye shape", "same nose", "retain smile").
When troubleshooting, it helps to save both the prompt and the best/worst outputs so you can systematically test which prompt changes make the biggest improvements.
🎨 Creative variations and advanced ideas I recommend experimenting with
Once you’ve mastered basic prompts, there’s a whole world of creative variations to explore. I often iterate through multiple thematic directions to build cohesive visual identities or narrative series.
- Theme series: Create a set of profile pics that share a consistent motif (e.g., seasonal tarot cards, city murals, neon colorways). This is great for evolving social accounts or content campaigns.
- Merch mockups: Use product-focused prompts (mugs, stickers, tote bags, enamel pins) to visualize how your generated likeness could become physical merchandise.
- Animated transitions: Generate multiple frames with slight pose or color variations and combine them into a GIF or short loop to animate a profile avatar.
- Collages and backgrounds: Create a mural or poster-style background that complements a simpler avatar, then overlay the headshot for cohesive branding.
- AR/VR avatars: Use Gemini images as concept art for 3D artists to model AR-ready avatars that retain stylistic cues from your chosen treatment.
One advanced trick I use is to generate a high-fidelity reference image in Gemini and then ask a vector-based tool to trace the lines for a scalable SVG avatar set. This gives me crisp, brandable assets that look consistent across sizes.
🗣️ Case studies and user stories: how people have used these prompts
Although my video highlighted playful examples, I also want to report on real-world applications and potential case studies. Below are hypothetical but realistic scenarios that demonstrate the practical utility of Gemini-generated profile pics.
Case study 1: Creative portfolio refresh
Background: A freelance designer wanted a bold portfolio site. They needed a hero image that reflected their craft while being personal.
Approach: Using the Graffiti Mural prompt, we created several mural-style images of their portrait in different city contexts, then selected one for the homepage hero and another cropped version for their profile pic.
Result: The portfolio saw increased time-on-page and social shares. The mural treatment matched the designer’s aesthetic and sparked conversations with prospective clients.
Case study 2: Streamer rebrand
Background: A Twitch streamer needed a more consistent brand identity across Twitch, YouTube, and social platforms.
Approach: We generated a neon sign avatar set (different neon colors for different moods) and a matching banner produced with the same neon concept. For subscriber badges, we created simplified neon glyphs derived from the main avatar.
Result: Channel identity strengthened, subscriber conversions improved, and fans appreciated the cohesive look and unique merch opportunities.
Case study 3: University student cohort
Background: A student community wanted a fun set of avatars for a cohort page. They used the free pro plan designed for students (https://gemini.google/students).
Approach: Students generated tarot-card portraits reflecting disciplines (e.g., "The Programmer", "The Biologist") and displayed them as a gallery.
Result: The gallery fostered community engagement and was used in orientation materials. It demonstrated how accessible creative tools can enhance campus identity.
🎓 How students can access Gemini’s free pro plan (and why I recommend it)
For students and educators, we offer access options that make advanced features more available. If you are eligible, here’s a concise step-by-step on accessing the free pro plan and getting the most out of it.
- Visit https://gemini.google/students to check eligibility and the program details.
- Sign in with your institutional email if required and follow verification steps.
- Once verified, you’ll have access to higher-tier generation quotas and advanced features suitable for creative coursework or projects.
- Use the pro plan for batch generations, higher fidelity outputs, and educational experiments. It’s a great way to explore multiple iterations without worrying about strict limits.
I recommend students use the program to learn prompt engineering, composition, and ethical AI practices. We provide educational resources and documentation to help teachers integrate Gemini into visual and design curricula.
🚀 Final thoughts and next steps — my newsroom-style wrap-up
In the video I published, I gave viewers four sample prompts to quickly upgrade their profile picture using Google Gemini. Here in the article, I’ve expanded on that announcement with technical details, prompt templates, step-by-step workflows, troubleshooting guidance, platform-specific advice, and ethical considerations.
If you want to experiment right away, start with one of the four prompts I outlined: Graffiti Mural, Tarot Card, Neon Sign, or Ceramic Mug. Use the exact templates I provided as a base, and then iterate. Don’t be afraid to run many generations; the best image often appears after several rounds of experimentation and refinement.
Also remember these practical rules of thumb I use every time:
- Start with clean input (good-quality headshot) for likeness preservation.
- Be explicit in your prompt about style, medium, and facial constraints.
- Generate multiple variations and pick the top candidates before refining.
- Test the final image at the actual profile size to ensure recognizability.
- Respect consent and privacy whenever generating images of other people.
Finally, if you enjoyed the video and want to dive deeper: try Gemini now at https://gemini.google.com/, learn more about image generation at https://gemini.google/overview/image-generation/, and follow Gemini on Instagram at https://www.instagram.com/googlegemini/ to see community highlights and inspiration.
Thank you for reading. I hope this broadcast-style guide helps you Nano Banana your profile pic with creativity and confidence.


