Table of Contents
- 🎣 The headline: a nine-minute vibe code becomes a playable fishing demo
- 🧭 What vibe coding means in practice
- 🧰 The setup: AI Studio, Gemini 3, and a weird prompt
- 🔎 The planning step: inspect before you run
- 🧩 From prompt to playable: mechanics the model generated
- 🛠️ The bug: when cast didn’t fire
- 🐋 The memorable moment: catching a whale on the first try
- 🧱 Design decisions that mattered
- 🧠 What I learned about working with AI-assisted coding tools
- 📂 How the generated project was organized
- 🛡️ Practical tips for avoiding common generation pitfalls
- 🔁 Iteration rhythm: generate, inspect, run, fix, repeat
- 📈 How to scale a demo into a small game jam project
- 🔗 Tools I mentioned and why they matter
- 🗣️ A few quotes that summed up the session
- ⚙️ Practical checklist to recreate the demo
- 🔬 Notes on ethics and content safety
- 📣 Final thoughts and the emotional arc of rapid prototyping
- ❓FAQ
🎣 The headline: a nine-minute vibe code becomes a playable fishing demo
I built a small fishing game using Gemini 3 inside AI Studio and turned a short, improvisational prompt into a playable scene set on a wooden boat at sunset in Oklahoma. The prompt was intentionally messy and weird: cast the line with the space bar, catch fish, a whale, or a tire, and if you hook a whale you have to mash spacebar to reel it in. It sounds ridiculous on paper—whales in Oklahoma and all—but that mismatch is exactly the kind of constraint that forces an iterative, exploratory workflow.
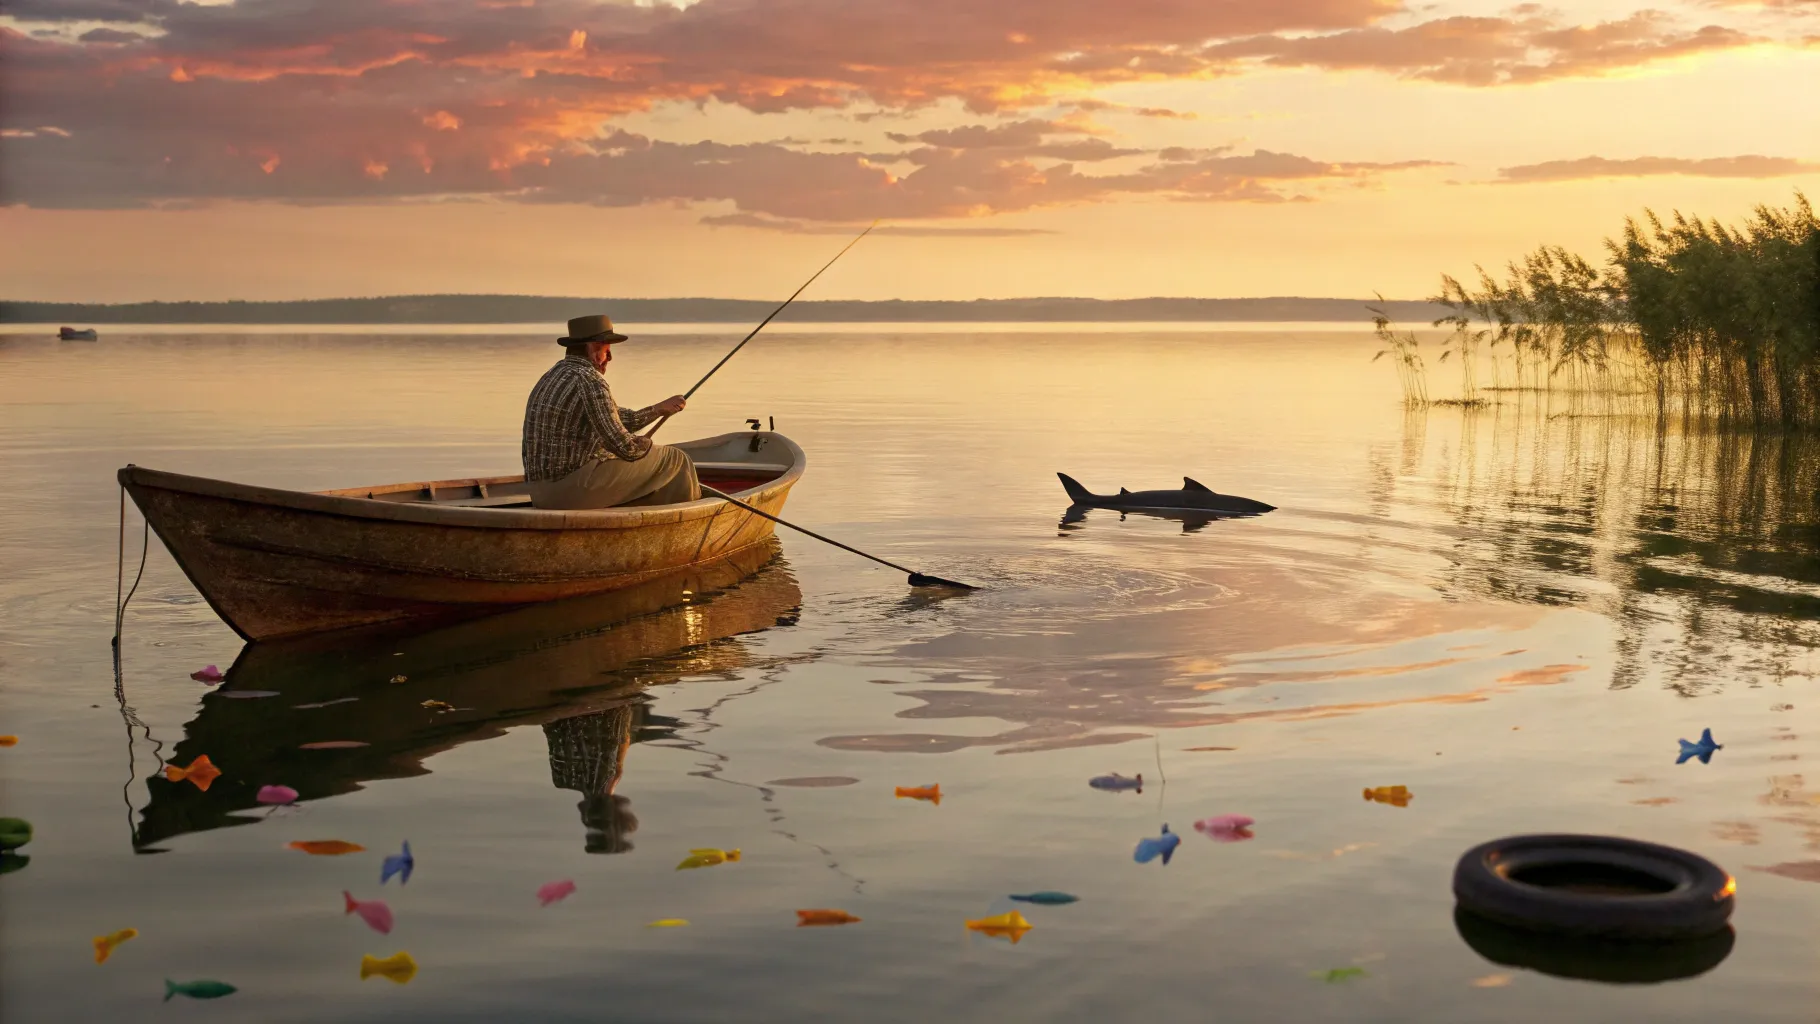
What I ended up with was a lake populated with fish, a cast-and-wait mechanic, a basic reeling minigame for whales, a tire as a “junk catch,” and an Oklahoma sunset sky. The most interesting part wasn’t the final artifact. It was how the model, the editor, and I cooperated in real time: planning files, generating components like sky.tsx, wiring up mechanics, surfacing a small bug where the cast input didn’t trigger, and then fixing it. That loop—specify, generate, test, fix—was the whole point.
🧭 What vibe coding means in practice
When I say vibe coding, I mean working at the level of intent and feeling rather than typing every line of scaffold by hand. Instead of coding the entire game from scratch, I described the scene, the inputs, and the behaviors I wanted and let the studio generate components and project files. I stayed involved: I reviewed the planning step, inspected generated files (like the sky component that was literally labeled Oklahoma sunset), and iterated on the output when something didn’t match the vibe.
Vibe coding is collaborative. The model proposes a structure, I accept or tweak pieces, and then we run it. The entire process is also exploratory: at times the model surprises you with functional code, and at others you need to jump in and patch things manually or re-prompt. That balance—trust the model to scaffold, but keep control when the mechanics matter—is what makes the workflow productive and fun.
🧰 The setup: AI Studio, Gemini 3, and a weird prompt
I used AI Studio (formerly Maker Suite) powered by Gemini 3. The studio gives you a planning step where the system lays out files it will create. That planning step is one of my favorite parts because it exposes intent. You can hover over checkboxes and it will tell you in plain English what each file does. For example, seeing sky.tsx annotated as Oklahoma sunset immediately gave me the right aesthetic expectations.
The prompt I fed in was intentionally short and silly. It read roughly like this: create a fishing game where you are on a wooden boat, press the space bar to throw a line, catch fish, a whale, or a tire, and if you get the whale you must rapidly hit space to reel it in. Put it in a lake in Oklahoma at sunset. That was it. No boilerplate. No specification for physics or asset style. Just the vibe.
Why such a loose prompt? Because vibe coding is about giving the model a direction and then iterating. Tight prompts can work too, but part of the fun here was seeing how the studio interpreted a high-level idea into concrete components and gameplay mechanics.
🔎 The planning step: inspect before you run
The planning step is a crucial checkpoint. It lists every file the system intends to create and includes small descriptions. I always look through this because it helps avoid surprises and gives you chances to fine-tune names, separate concerns, and set expectations for the runtime behavior.
- Component breakdown: The generator created front-end components such as the sky, the boat, the water, the fishing line logic, and an index file to glue things together.
- File names matter: Seeing descriptive names like Oklahoma sunset in a sky file reassured me that the model understood the aesthetic requirement.
- Chunked generation: The studio brought in pieces incrementally, which made it easier to inspect and reason about each part rather than receiving a monolithic blob of code.
That incremental visibility is what differentiates vibe coding from simply pasting a huge prompt and hoping for the best. It lets you sculpt the project in layers.
🧩 From prompt to playable: mechanics the model generated
The generated project included the core mechanics I requested. Here’s how those mechanics mapped to simple modules and behaviors:
- Casting - map the space bar input to a cast action that spawns a cast line and a bobber sprite in the water. The model wired this to a single key event handler so I could press space to cast.
- Waiting and catching - the bobber checks for physics overlaps with randomly spawned catchable entities and triggers a catch event.
- Catch categories - fish, whale, and tire spawn with different rarities. Fish are common, tires are common junk, whales are rare but trigger a different mechanic.
- Whale reeling - if you hook a whale, the game switches into a reeling state where rapid presses of the space bar increase a reel progress meter. If you fail, the whale escapes, which adds tension.
- Environment - dynamic sky with sunset tones and a wooden boat prefab for the player camera anchor.
The interesting part was that these mechanics were created as modular chunks. I could inspect and change the rarity table, the event wiring, or the input handling without unraveling unrelated code.
🛠️ The bug: when cast didn’t fire
After the initial generation I ran the game to test the cast mechanic. On first run, I couldn’t cast reliably. The studio had created the casting handler, but something in the event wiring prevented the keypress from triggering the spawn logic consistently.
This is a typical moment: the model is great at generating plausible code, but edge cases and integration bugs still happen. I opened the created files, scanned the input handler, and found a small mismatch in how the input state was read versus how the cast function expected it to be called.
A quick change fixed it: adjust the key event listener to tie into the main game loop properly, ensuring it was not inadvertently blocked by a modal state or focus issue. Once I patched that, the cast worked predictably and I could move on to testing catches.
🐋 The memorable moment: catching a whale on the first try
After the fix, I cast and waited. On the first playable cast after the patch, the bobber drew a heavy tug: a whale. The project had added a reeling mini-game where you rapidly press space to reel the whale in. I mashed the space bar and felt that classic game-joy of a simple, physical action translating directly to success or failure.
That moment was a mixture of surprise and validation. Surprise because the whale spawn is intentionally improbable, and validation because the model had not just generated aesthetic assets but tied together input, state transitions, and feedback in a way that felt meaningful.
🧱 Design decisions that mattered
A few small design choices made the game feel complete despite being a quick demo. These are things I pay attention to when vibe coding:
- Feedback loops - simple audio or visual cues for a bite, a catch, and reeling progress make the mechanic feel responsive. Even a quick splash animation or a sound effect does a lot of heavy lifting.
- Rarity balance - whales must feel rare to be exciting. The generator defaulted to reasonable rarity values, but I always check and tune these parameters.
- Failure states - giving players the chance to fail (the whale escapes) adds emotional stakes and makes success feel earned.
- Environment cohesion - a wooden boat anchor and an Oklahoma sunset sky gave the scene a single mood. Consistency in lighting and palette made the small world believable.
These may look like small details, but they transform a technical demo into a joyful interaction.
🧠 What I learned about working with AI-assisted coding tools
A few insights came out of this build that I consistently use when working with model-assisted development:
- Start with a clear intention. The single-sentence prompt laid out the core loop. Keep the scope small and the intention clear: cast, catch, reel if whale. This prevents scope creep and keeps generation focused.
- Use the planning step. Inspect the files the tool intends to create. Rename, reorder, or uncheck files if you want a different structure. The model’s plan is a design proposal you can accept or refine.
- Iterate quickly. Run early and often. Short loops help catch wiring mistakes or UX issues quickly. Fix the smallest reproduceable bug first.
- Trust but verify. Generated code can be surprisingly good, but integration and edge cases still need developer attention. Treat model output as scaffold, not final product.
- Keep the vibe. If you want a consistent feel, call it out. Saying “Oklahoma sunset” in the prompt got me a sky component that followed that tone. Naming matters.
📂 How the generated project was organized
The generator produced a small set of files that were easy to reason about. A typical layout included:
- index.tsx or a root file that bootstrapped the scene and attached input handlers
- components/ folder for the boat, bobber, and UI elements
- systems/ folder for game logic like spawning and reeling
- styles or themes including a sky component labeled with the sunset aesthetic
Because the generator chunked files, I could open just the spawning system and understand how rarities and catch behavior were implemented without diving into rendering or UI code.
🛡️ Practical tips for avoiding common generation pitfalls
Here are a few guardrails I recommend when vibe coding with a code-generating model:
- Define explicit inputs. If a key is required for an action, name it in the prompt. For example say space bar to cast rather than just press a key.
- Request modular components. Ask the model to separate input handling from game logic. This reduces accidental coupling and makes debugging easier.
- Check for focus issues. If a UI element or modal can take keyboard focus, it may prevent input handlers from firing. Make the root input binding resilient to focus changes.
- Test edge cases. Rare events like whales should be testable without waiting for RNG. Temporarily increase spawn chance or add a debug key to force specific spawns.
- Make small reproducible fixes. If something breaks, isolate the smallest reproducible case and patch that. It’s faster than sweeping refactors.
🔁 Iteration rhythm: generate, inspect, run, fix, repeat
My workflow looked like this:
- Write a single-paragraph prompt describing the desired mechanic and vibe.
- Run the generator and inspect the planning step. Rename or uncheck files if needed.
- Open generated files with a focus on the mechanics I care about: input handlers, spawning, and state transitions.
- Run the game. Observe behavior, log issues, reproduce bugs.
- Patch quickly and rerun. If a bug is subtle, temporarily increase trace logging or difficulty to reveal it.
This short loop is the essence of vibe coding. The model accelerates scaffolding, and I provide the human judgment to shape it into something playable.
📈 How to scale a demo into a small game jam project
If you want to take a vibe-coded demo and expand it into a more complete project, here are scalable next steps:
- Polish the core loop. Make sure casting, catching, and reeling feel satisfying. Add sound, haptics, and animations for weight.
- Introduce progression. Add levels, rarer catches, unlockable boats, or an economy for selling catches.
- Improve art and assets. Replace generated placeholder art with hand-drawn or packaged art assets to increase polish.
- Add persistence. Save progression or player stats locally or in a lightweight backend.
- Playtest. Get feedback on difficulty and fun. Adjust spawn probabilities, reeling difficulty curves, and reward pacing.
Scaling is mostly about focus and iteration. Small, consistent improvements to feedback and reward systems create a lot of perceived value.
🔗 Tools I mentioned and why they matter
A few platform and tool names came up during the build. Here’s a quick context on each:
- AI Studio - the IDE environment where I prompted Gemini 3 and generated the project scaffold. It exposes a planning step and incremental file generation.
- Gemini 3 - the model that interpreted the prompt and produced code and component structure. It’s good at multi-file generation and keeping a consistent aesthetic when you name things clearly.
- Maker Suite - historic name you might still see in places. The studio used to be called Maker Suite and some internal references still exist.
- Opal - another labs experiment that focuses on chaining model calls and building agents. It’s useful for multi-step workflows like certification checks or documentation generation.
These tools aren’t interchangeable but they complement each other. AI Studio is optimized for generating and iterating on code projects, while experimental tools like Opal are great for orchestrating multi-step model-driven processes.
🗣️ A few quotes that summed up the session
I asked the system to: "When you throw the fishing line, you should catch a fish, a whale, or a tire." That mismatch—whale in Oklahoma—keeps things entertaining and forces the system to decide how to handle improbable constraints.
On the planning step: "If you hover over one of the little check boxes, it'll actually tell you what the file does and like in a plain as English." That small UX detail is huge for quickly understanding generated code.
⚙️ Practical checklist to recreate the demo
Here’s a short checklist you can follow to recreate a similar demo quickly:
- Open AI Studio and select a new project using Gemini 3.
- Write a compact prompt: describe the scene, the core mechanic, input keys, and the mood. Example: Wooden boat, lake, Oklahoma sunset. Press space to cast. Catch fish, whales, or tires. Whale triggers rapid-space reeling.
- Review the planning step. Ensure there’s a clear input handler file, a spawn system, and modular components for UI and environment.
- Run the project. If casting is flaky, check input focus and event binding in the root file.
- Tune spawn probabilities or add a debug key to force rare events like whale spawns.
- Add small polish: sound effects for bites, a progress bar for reeling, and a brief particle splash on successful catches.
🔬 Notes on ethics and content safety
Tools that generate code can also create content that may inadvertently include unsafe or copyrighted material if prompts ask for specific assets or code snippets verbatim copied from proprietary sources. When using generated assets or code in production, make sure to:
- Replace generated images or sounds with assets you own or that are properly licensed.
- Audit generated code for security smells before using it in production.
- Respect user privacy and avoid embedding telemetry that isn’t disclosed.
For a small demo, these are straightforward to manage, but they matter if you scale or publish broadly.
📣 Final thoughts and the emotional arc of rapid prototyping
There’s something energizing about taking a weird, half-formed idea and turning it into a tangible interaction in minutes. The combination of a lightweight prompt, a planning step that maps intent to files, and a short iterate-run-fix loop creates a very different development rhythm than the one where you sit and type for hours.
The whale catch was the cherry on top. It’s a reminder that models can do more than generate boilerplate; they can connect behaviors, inputs, and feel into a cohesive moment. That’s the potential I get excited about: using models to reduce friction in the early stages of design so the human can focus on what matters most—play, feel, and the creative choices that make games memorable.
❓FAQ
How do I start vibe coding a game with Gemini 3?
Begin with a concise prompt that describes the core loop, key inputs, and the visual mood. Use AI Studio to generate a scaffold, inspect the planning step, and then run small iteration loops: generate, inspect, run, and fix. Keep scope tiny for the first build—think one mechanic or interaction.
What should I include in my prompt to get better output?
Name the inputs (for example space bar to cast), define the scene and mood (for example Oklahoma sunset), and describe the primary behaviors (cast, wait, catch, special reeling for whales). Ask for modular files so input handling is separated from game logic. Short, specific sentences often work better than long paragraphs.
How do I debug input issues like a space bar that won’t trigger?
Check focus and modal states first. Ensure your root input binding is attached to a reliable event source and not blocked by a UI element. Add logging around event handlers to confirm events are received. If the model generates an input handler, inspect whether it expects a different state object or event signature than your environment provides.
Can I force rare events like whale spawns for testing?
Yes. Add a debug key or temporarily increase spawn probability. One common approach is to include a developer panel or to expose a debug flag that forces specific spawn types. That speeds testing and helps you iterate on mechanics without waiting for RNG.
What’s the value of the planning step in AI Studio?
The planning step is a proposal of the files and responsibilities the generator will create. It gives you visibility into structure and intent so you can rename files, reorder work, or prevent unwanted files. It reduces surprises and makes the generated project easier to reason about.
How do I ensure consistent aesthetic like "Oklahoma sunset"?
Name the aesthetic in the prompt and in component names. Ask the generator to create a dedicated sky component or theme file labeled with the desired mood. Then review and tweak color values or lighting in that single place to maintain cohesion across the scene.
Is generated code production-ready?
Generated code is a strong starting point but rarely production-ready without review. Verify security issues, replace placeholder assets with licensed ones, and run standard testing. Treat generated output as scaffold and accelerate iteration rather than as final ship-ready code.
What are simple next steps to turn a demo into a polished game?
Add audio and visual polish, tune rarity and reward curves, introduce progression or unlockables, and implement persistence for player stats. Playtest for difficulty balance and iterate on the reward pacing to create a satisfying experience.


